I can’t believe that the last time I mentioned my home monitor project was exactly six years ago! For those who haven’t heard of it before the home monitor project is a home automation system running in my house which attempts to capture as much useful information and control as much as is possible with the absolute minimum of expensive equipment. It is also acting as a bit of a playground for doing fun things with NetKernel.
It’s actually been up and running now for since 2004, though over that time it’s migrated from it’s original Pentium 166MHz MMX laptop running Windows 98(!) through to a Pentium III 866Mhz Dell laptop running Windows XP and only a week ago an almost modern Pentium M 1.6GHz Laptop running Ubuntu. Over that time too the interfaced hardware has changed too. In 2008 I got a real weather station with serial port connectivity from Santa. This mean that my uncalibrated thermistor temperature sensors could be retired along with the dodgy rain sensor. I’ve still got the original light dependent resistor monitoring daylight levels that has now seen over 2300 sunrises. Also the magnetic reed switches and PIR motion detectors are still working enabling me to determine when the house is occupied. These sensors were until recently connected up to a legacy joystick port but recently I moved them over to a future proofed USB experiment interface board the Velleman K8055. This board also allowed me to eliminate the need for a legacy parallel port which is interfacing via opto-isolators to the 4 channel wireless power switches. These wireless power switches are used to control central heating, dehumidifier and some lights. One other additional device I recently got connected was a Current Cost electricity monitor. This continually measures the total power usage as well as providing an additional handy temperature sensor. In it’s current form the server also has a USB DVB-T TV tuner and external hard drive with myth-tv running. Total steady state power consumption is 27W.
Software
The data architecture of the software is pretty much unchanged from my original description. It is still a three stage data pipeline. The first and second stages are issued by CRON jobs running at 1 second and 5 minute intervals respectively. The first stage monitors all the motion and door sensors detecting and counting transitions and firing off asynchronous requests for immediate action for events such as arriving home to an empty house. The state of this first stage is embodied in a resource call active:quickPoll which along with various other data resources from the weather station and power monitor are used by the second stage. The second stage, active:slowPoll aggregates all the information for the last 5 minutes and writes a record to the database, the data looks this:
<slow>
	<house>
		<moisture>0.0</moisture>
		<upstairs_deg_C>17.4</upstairs_deg_C>
		<downstairs_deg_C>16.3</downstairs_deg_C>
		<humidity>57</humidity>
		<atHome>false</atHome>
		<lastAtHome>5189024</lastAtHome>
		<inner>30</inner>
		<outer>0</outer>
		<innerDiff>0</innerDiff>
		<outerDiff>0</outerDiff>
		<power>195</power>
		<cpu_deg_C>39</cpu_deg_C>
	</house>
	<weather>
		<temperature_deg_C>10.3</temperature_deg_C>
		<humidity>92</humidity>
		<dewpoint>9.0</dewpoint>
		<light>0.43</light>
		<rain>246.0</rain>
		<pressure>1001.0</pressure>
		<wind_mph>0.0</wind_mph>
		<wind_angle>77.1</wind_angle>
	</weather>
</slow>
The third stage is a suite of groovy scripts which generate visualizations of the data and determine the actions that occur when different events take place. I have a web interface in place that allows these to be remotely edited. These are run on demand but are cached where appropriate.
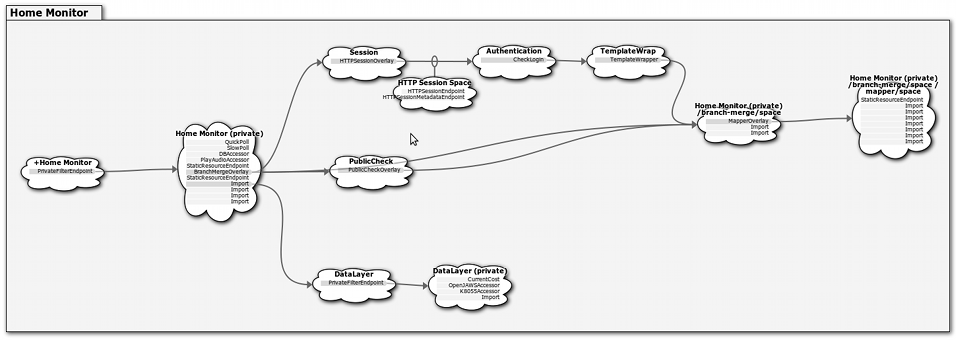
This is the Static Structure Diagram of the module. The architecture can be summarized as being three layer. The first layer (home monitor) controls access to the second layer (home monitor private /branch-merge) and splits out requests into one of two channels the first provides an authenticated session and the second allows unauthenticated access to certain resources. The third layer (data layer) hosts the hardware and database accessors. I’ve used a few interesting external projects to help with connectivity, these are libk8055, openJaWS, and RXTXcomm.
I won’t go into any more detail about the code. If anyone is interested I can send you the module.
Photos
Here are a few photos of the installation:
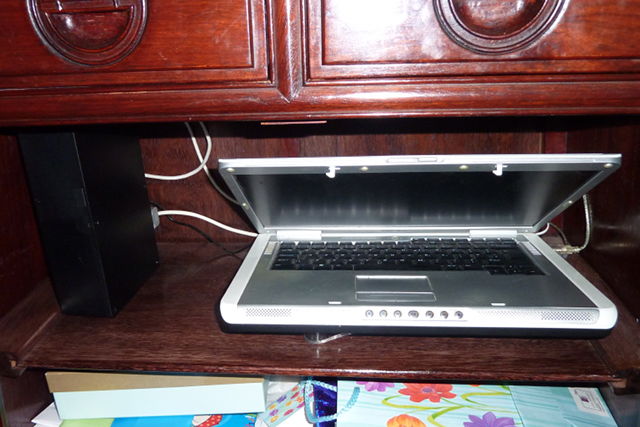 Installed and tidy in a cupboard!
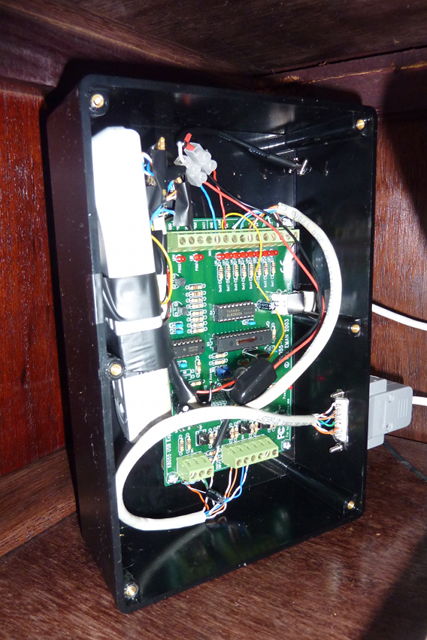 The interface board and wireless transmitter in a box
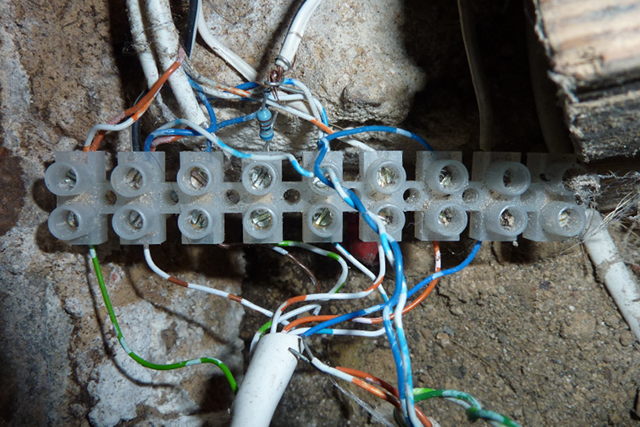 Spaghetti wires under the floor boards
 Closeup of the opto-isolators