This project builds a self-contained photo frame using a Raspberry Pi Zero and an old monitor. (Old monitors are better as the 4:3 ratio suits a mix of vertical and horizontal oriented photos better than a 16:9 ratio.)
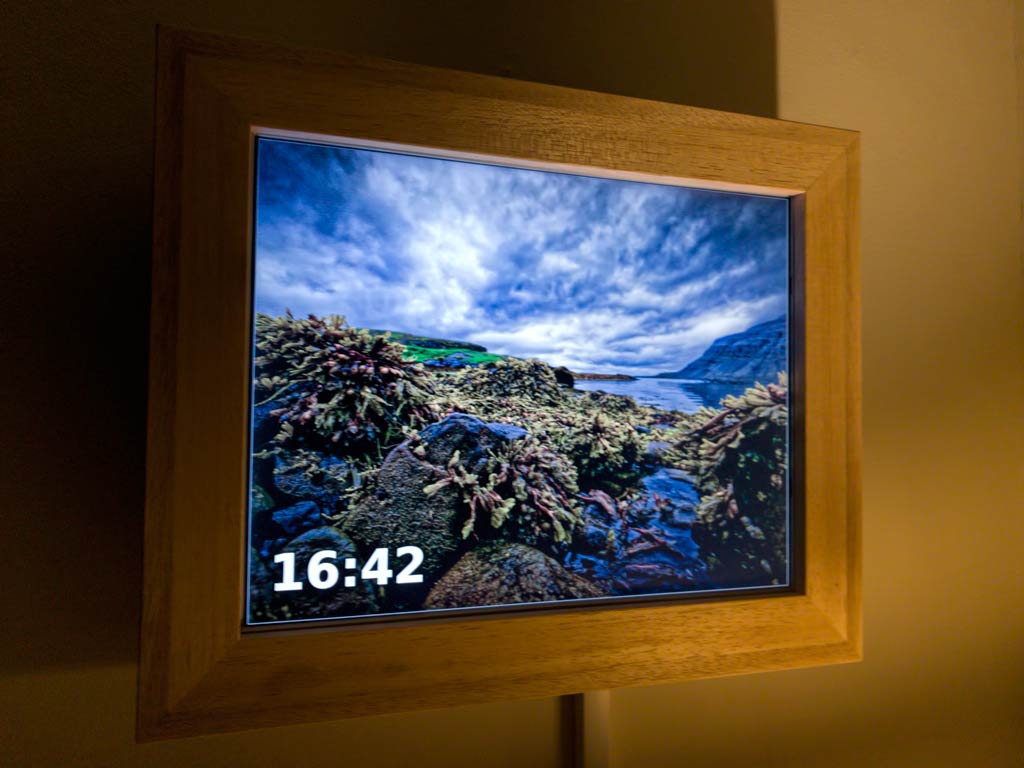 Figure 1: Finished Frame on wall
Hardware
Parts List
- Raspberry Pi Zero with micro SD containing Raspbian
- Power supply for Pi (see below)
- USB WIFI dongle
- VGA computer monitor
- VESA wall mount
- Custom made photo frame to fit monitor
- HDMI to VGA adaptor
I had a photo frame made by a framing shop with the inner dimensions of the monitor. I chose wood that was quite deep to cover the thickness of the old monitor.
To save on cabling, and because the monitor I used runs of it’s own 12v power supply, I used a cheap car usb charger to power the Pi from the monitors power supply. To do this you’ll need to be happy to cut the monitors power cable and do a bit of custom wiring.
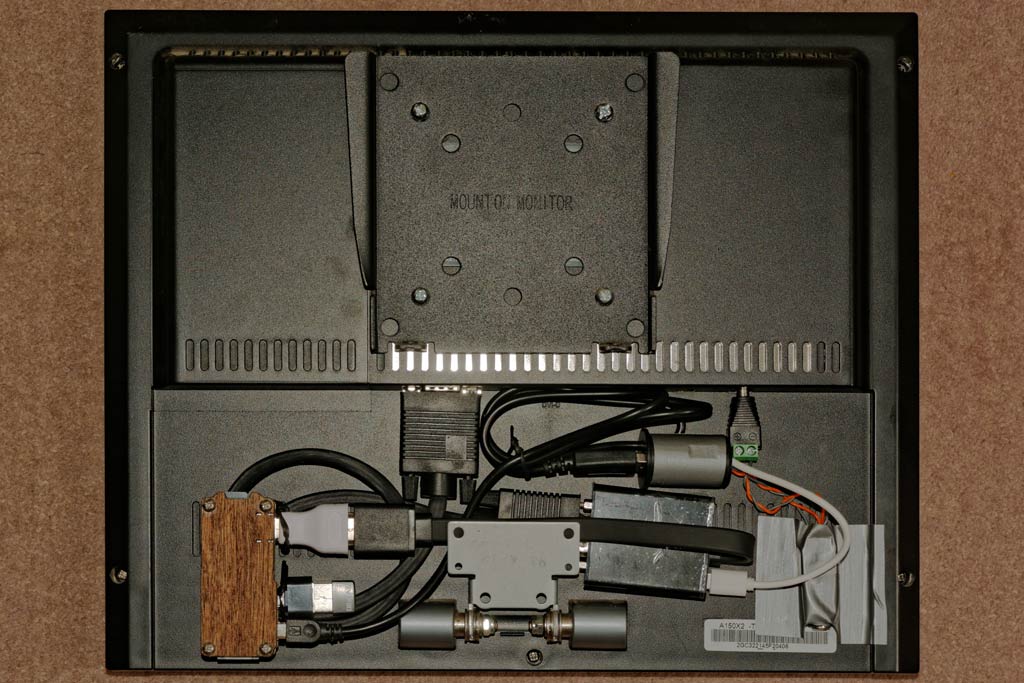 Figure 2: Back of photo frame showing wiring
- Connect up the Pi to the HDMI adapter and to the monitor and check that it works by powering up the Pi
- Configure the the Pi to connect to your WIFI network and enable SSH so that you can remotely administer Pi without keyboard or mouse.
- Mount VESA wall mount and attach monitor to wall.
- If you can’t hide wires use some plastic conduit to hide the wires. You can get double-sided sticky tape to make this job quick.
Web page
The easiest way to provide control over what is displayed is with a web-page using the in built Epiphany browser. I created a dynamic page using Javascript which loads a list of images from an RSS Feed. I use the MaxImage library to display images full screen and scaled to fit display.
I use PhotoNK, a photo management app that runs on NetKernel to provide an RSS feed with a list of images to display. However any online service that will do.
However there is a problem: security on browsers for some reason prohibit cross site loading of an RSS feed. This means it’s impossible have a filesystem based page on the frame that contains a javascript library to load the photo feed from an external server. When I first got this frame working Google provided an API that worked around this problem by loading an RSS feed converting it to JSON and adding CORS headers so that the browser would be happy with it. They have recently withdrawn this API and there appears to be no alternatives. :-(
Because I was using NetKernel I just moved my webpage to be hosted on the same server that serves the photo feed and created a simple RSS feed reading service. Of course this extra work makes my solution much less portable and less generally re-usable.
Energy saving and control
Because you don’t want your photo frame running 24x7 there needs to be some mechanism to switch it on and off. In this section I show how I do it. Most of this approach is re-usable even though I have implemented an approach that connects to my Polestar server that has a script to control the frame using REST requests based upon whether the house is occupied, if movement is detected and time of day.
Running on the Raspberry Pi I have a python script that runs as a permanent HTTP server hosting three REST services:
- /onStart - power up frame and start web browser fullscreen.
- /onEnd - kill browser and power down frame
- /onReboot - reboot RasberryPi
This script uses a linux program called tvservice that can switch the HDMI port of the RasberryPi on and off. This provides a very effective way of powering down the monitor and saving most of the power.
The script can be downloaded here.
The script is started when the Pi boots with the following CRON entry:
@reboot python /home/pi/dev/kiosk/kioskServer.py